
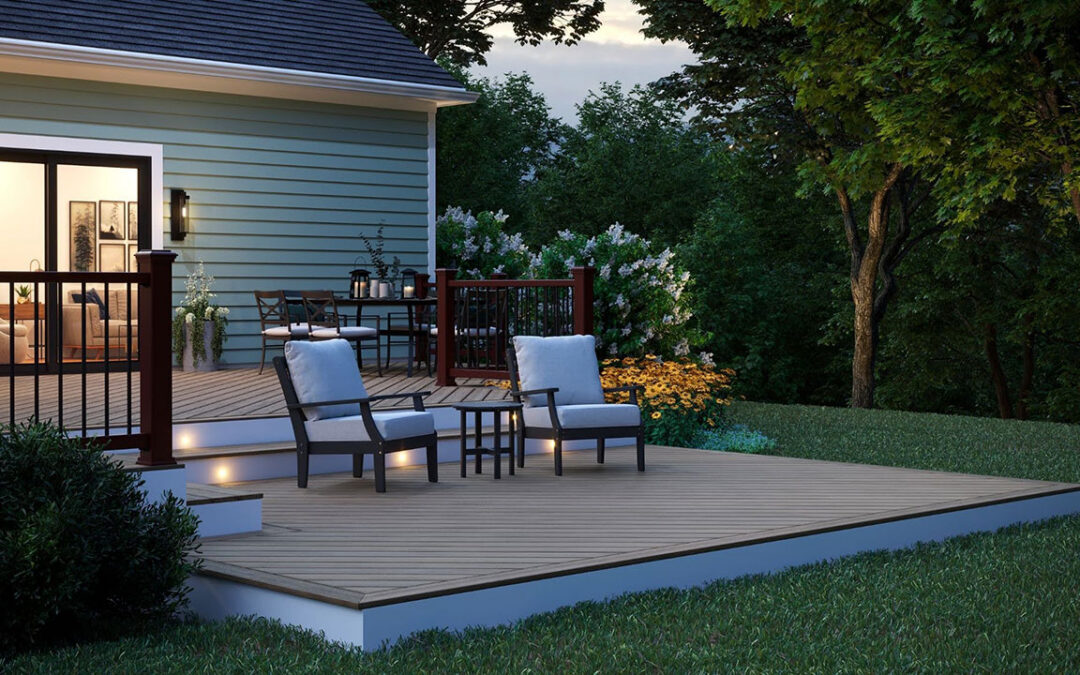
If you’ve been dreaming about adding outdoor living space to your backyard, but have felt held back by complex construction requirements, uneven terrain, or the hassle of attaching a structure to your home, a floating deck might be exactly what you’re looking for.
Floating decks are one of the fastest-growing trends in backyard design right now. They’re versatile, relatively straightforward to build, and can be placed just about anywhere on your property. Whether you’re envisioning a shaded reading nook near a garden, a gathering space by the fire pit, or a platform that makes the most of a sloped yard, a floating deck opens up a world of possibilities.
Here’s what you need to know before getting started.
Key Takeaways
- A floating deck is a freestanding structure that sits above the ground without being attached to your house or requiring deep concrete footings.
- They’re easier and less expensive to build than attached decks, making them a popular DIY-friendly option for homeowners.
- Permit requirements vary by location. Factors like deck height and square footage often determine whether you need one or not.
- Composite decking materials like Trex® are ideal for floating decks because of their durability, low maintenance needs, and resistance to ground moisture.
What Is a Floating Deck?
A floating deck is a deck structure that is not attached to your home and does not rely on deep frost-proof footings.
Sometimes called a freestanding deck, ground-level deck, or grade-level deck, it “floats” slightly above the ground and is supported by posts or concrete blocks that rest on or just below the surface. This is unlike a traditional attached deck, which is anchored to your home’s ledger board and typically requires a building permit in most jurisdictions. It’s structurally independent from the house.
Most floating decks sit between 8 and 24 inches off the ground, though some are built even closer to grade level, practically flush to the lawn. The lower they sit, the less complex the build and, in many cases, the simpler the permitting process.

5 Benefits of Building a Floating Deck
There’s a reason so many homeowners are drawn to floating decks. Here’s what makes them an appealing option.
1. Easier Installation
Because floating decks don’t require attachment to the house structure and don’t always demand deep footings, they’re much simpler to build than traditional decks. Many DIY-confident homeowners tackle them on their own over a weekend or two, especially when working with composite boards that are straightforward to cut and fasten.
2. Flexibility in Placement
Floating decks aren’t limited to the back door. You can place one in the middle of the yard, next to a garden, at the end of a pathway, or up against a detached garage. That flexibility allows you to create outdoor living space exactly where you want it, not just where your house structure allows.
3. Works Well on Difficult Terrain
Have a yard with uneven ground, slopes, or areas where attaching a structure to the house just isn’t practical? A floating deck handles these situations well. By adjusting post heights, builders can create a level platform even when the ground beneath it isn’t flat.
4. Lower Cost (Generally)
Without the need for deep footings, ledger board attachment, or complex waterproofing at the house connection, floating decks typically cost less to build. Materials and labor savings can be significant. This all depends on the design and size, of course.
5. Relocatable
Because a floating deck is freestanding, it can technically be disassembled and rebuilt elsewhere on the property if your needs change. This isn’t always practical, but it’s a genuine advantage over a permanently attached structure.
Floating Deck vs. Attached Deck
| Feature | Floating Deck | Attached Deck |
| Connection to Home | None, freestanding | Attached to ledger board on house |
| Footing Depth | Shallow or surface-level | Deep frost-proof footings required |
| Permit Requirements | Often not required (check locally) | Usually required |
| Placement Options | Anywhere in the yard | Adjacent to the house |
| Typical Build Difficulty | DIY-friendly to moderate | Moderate to complex |
| Average Cost | Lower | Higher |
| Structural Complexity | Less complex | More complex |
How to Build a Floating Deck: The Basic Steps
While every project is unique, floating deck builds tend to follow a similar sequence. Here’s a general overview of the process.
Step 1: Plan Your Layout and Size
Start by deciding where the deck will go and how big it will be. Sketch out the footprint, think about traffic flow, and consider how the deck will connect to the rest of your outdoor space. The size you choose will also influence whether a permit is required (more on that below).
Step 2: Check Local Regulations
Before breaking ground, contact your local municipality or building department to ask about permit requirements for a floating deck of your planned size and height. This step is easy to skip and easy to regret. More on this in the next section.
Step 3: Prepare the Ground
Mark your perimeter and clear the area of grass and organic material. Many builders lay landscape fabric or gravel to discourage weed growth and improve drainage under the deck. Good drainage is one of the most important long-term considerations for any deck, especially one sitting close to the ground.
Step 4: Set Your Footings or Deck Blocks
Floating decks typically use one of two types of support: surface-mounted concrete deck blocks or shallow concrete footings. Deck blocks are the simpler option and work well in stable soil with minimal frost heave concerns. Shallow footings offer more stability in areas with significant freeze-thaw cycles, which is worth considering here in Michigan.
Place your support blocks or footings at all corners and at regular intervals across the deck perimeter, following local building codes for spacing.
Step 5: Build the Frame
Construct the structural frame using composite decking or pressure-treated lumber. This typically includes rim joists around the perimeter and interior joists spaced 12 to 16 inches on center. Use joist hangers and exterior-grade fasteners throughout. Double-check your frame is square and level before moving on.
Step 6: Install the Decking Boards
Now comes the most rewarding part: laying the deck surface. If you’re using composite decking like Trex, follow the manufacturer’s installation guidelines for proper spacing and fastening. Composite boards require consistent gapping to allow for thermal expansion and drainage.
Step 7: Add Finishing Touches
Depending on the deck height, you may need to install railing. It’s typically required for decks over 30 inches from grade. You may also add stairs if needed, finish the fascia boards, and consider lighting to extend the usability of the space into the evening.
Do You Need a Permit for a Floating Deck?
It depends. Permit requirements for floating decks vary by municipality, county, and state. There is no universal rule, but there are a few general principles that apply in many areas:
- Size matters. Many jurisdictions exempt decks under a certain square footage — often 200 square feet — from permit requirements. A small floating deck that stays below that threshold may not require a permit at all.
- Height matters. Decks 30 inches or less above grade are often treated differently than taller structures. Many floating decks naturally fall into this lower-height category.
- Attachment matters. Because a floating deck doesn’t attach to the house, it avoids some of the structural concerns that trigger permit requirements for attached decks.
- Always check locally. Even if a floating deck sounds like it should be permit-free, never assume. Contact your local building department before you build. Unpermitted structures can create problems when you sell your home, and in some cases, you may be required to remove or modify the structure.
A helpful starting point is your municipality’s building department website, or you can ask our team at whichever Zeeland Lumber & Supply location is closest to you. We’re happy to point you in the right direction.
Additional Considerations for Floating Decks
Building the structure is only part of the equation. Keep these factors in mind for a deck that looks great and lasts for years.
Drainage
Water that pools under a low-lying deck can accelerate rot in wood framing, cause frost heave issues in cold climates, and create an environment where pests thrive. Grade the soil so water drains away from the deck footprint, and consider using gravel or crushed stone as a base layer underneath the structure.
Ground Stability
Soft, poorly compacted, or organic soil can cause footings to shift or settle over time. Know your soil conditions before you build, and don’t be afraid to consult a professional if the ground conditions give you pause.
Frost Heave in Cold Climates
Here in Michigan and the broader Midwest, freeze-thaw cycles are an important consideration. Shallow deck blocks can shift as the ground freezes and thaws. Using properly placed footings that extend at least partially below the frost line, or using adjustable deck pedestals, can help keep your deck level over time.
Ventilation
Even a few inches of airspace under a floating deck helps with ventilation and drying, reducing the chance of moisture damage to the frame. Avoid blocking airflow under the deck completely.
Long-term Durability
The framing of a floating deck is in closer contact with the ground environment than an elevated deck, which means moisture and pests are bigger concerns. Pressure-treated lumber is essential for framing. For the deck surface itself, choosing a material that handles moisture exposure exceptionally well is a smart move — which brings us to our top material recommendation.
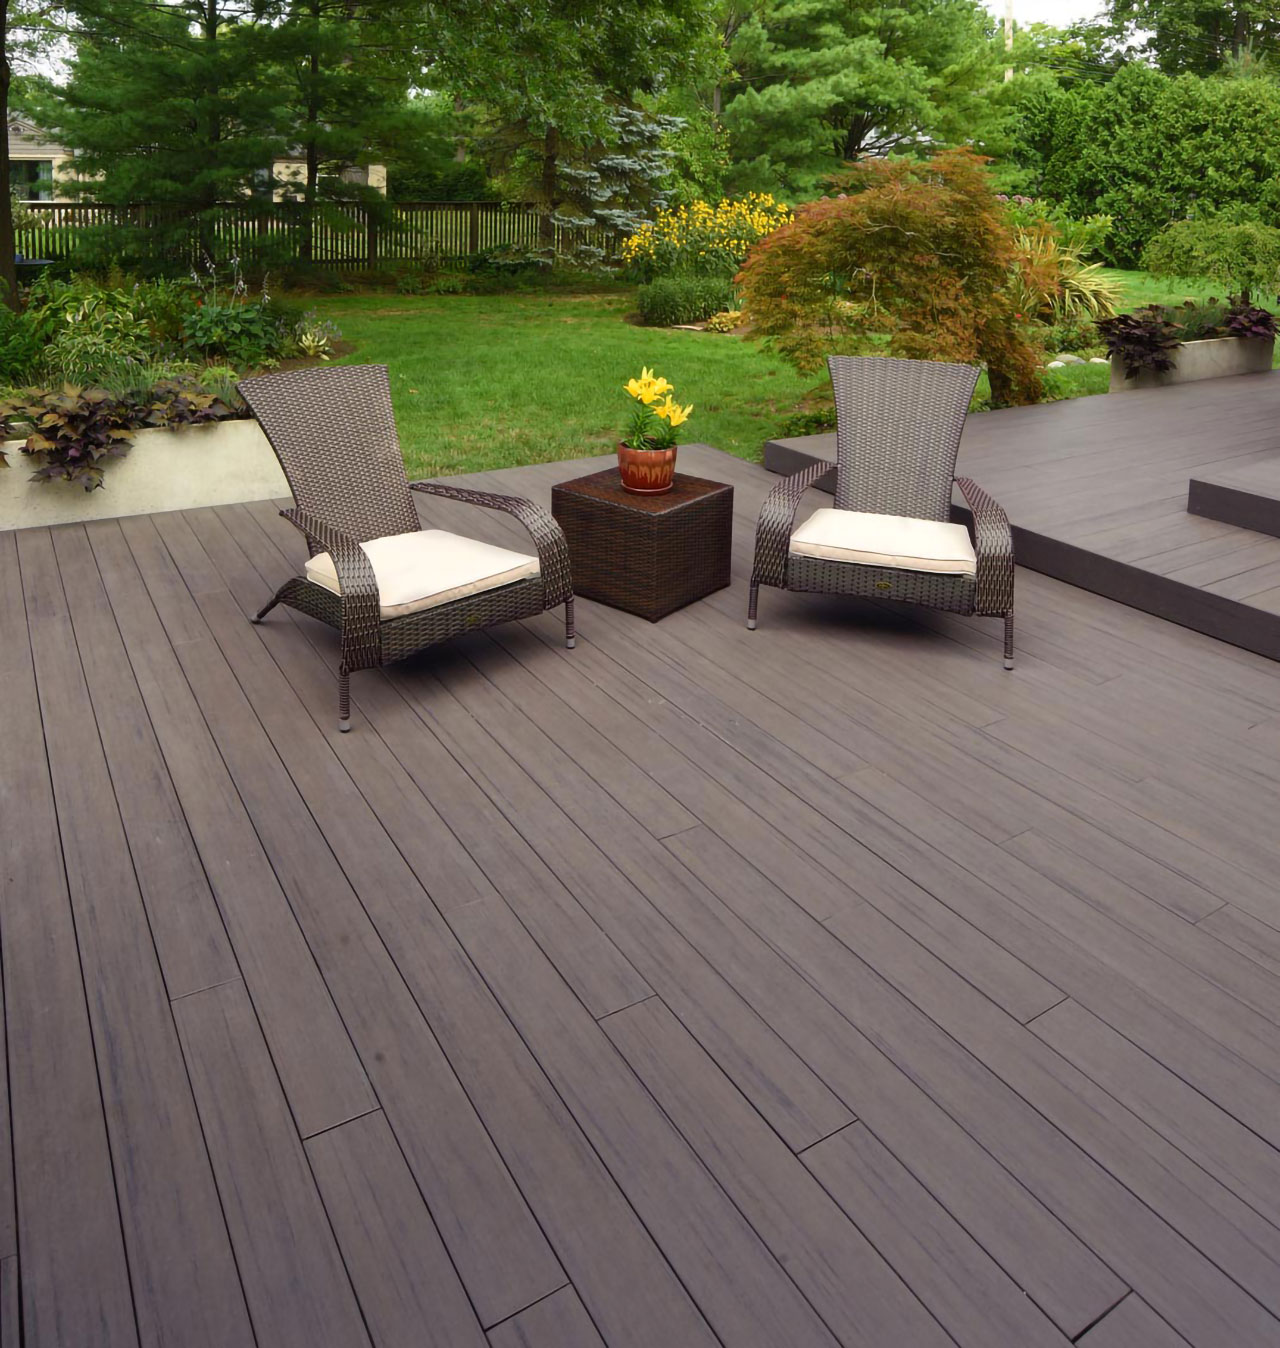
The Best Surface for a Floating Deck: Trex Composite Decking
The ground-level environment creates unique challenges for floating deck materials. Trex composite decking is engineered to handle them all.
Trex is our top pick for floating deck surfaces for these reasons:
- Moisture resistance. Trex boards are protected by a capped composite shell that prevents moisture absorption, the single biggest enemy of a ground-level deck. Traditional wood decking absorbs moisture readily, which leads to rot, warping, and cracking over time.
- No staining, sealing, or sanding — ever. A floating deck is often placed in a spot you want to enjoy, not maintain. Trex requires nothing more than occasional soap and water cleaning.
- 25-year warranty. Trex backs its product with a 25-year limited warranty that covers material defects, fading, and staining.
- Made from 95% recycled materials. Trex is one of the best sustainable decking products on the market, made from recycled wood fibers and plastic film. In fact, there are approximately 140,000 recycled plastic bags in every 500 square feet of Trex decking!
- Pest-resistant. Because Trex contains no food source for insects, it’s unattractive to termites, carpenter bees, and other pests.
We’re proud to carry Trex decking at Zeeland Lumber & Supply. We have a number of colors and profiles in our inventory and are happy to help you find the best fit for your project.
Choose the Right Floating Deck Material: A Quick Comparison
| Trex Composite | Pressure-treated Wood | Cedar/Redwood | |
| Moisture Resistance | ⭐⭐⭐⭐⭐ | ⭐⭐⭐ | ⭐⭐⭐ |
| Required Maintenance | Minimal (soap & water) | Annual sealing/staining | Annual sealing/staining |
| Pest Resistance | ⭐⭐⭐⭐⭐ | ⭐⭐⭐ | ⭐⭐⭐⭐ |
| Lifespan | 25-30 years | 15-20 years | 15-20 years |
| Upfront Cost | Higher (see estimates here) | Lower | Moderate |
| Long-term Value | Excellent | Good | Good |
| Eco-friendliness | ⭐⭐⭐⭐⭐ | ⭐⭐ | ⭐⭐⭐ |
If you’d like to weigh the differences between wood and composite in more detail, check out our full breakdown here.
Frequently Asked Questions About Floating Decks
How long does it take to build a floating deck?
A small-to-medium floating deck (around 200-300 square feet) can typically be framed and surfaced over a long weekend by a skilled DIYer, or in one to two days by an experienced crew.
How high off the ground should a floating deck be?
Most floating decks sit between six and 24 inches above grade. The lower the better for simplicity, but you need enough clearance for airflow and drainage — typically at least six inches. Decks over 30 inches high usually require railing and may trigger additional permit requirements.
Can I build a floating deck on a slope?
Yes, and this is actually one of the strongest use cases for a floating deck. By adjusting post heights, you can create a perfectly level surface even on uneven or sloped terrain. This is much simpler than grading the entire area.
How much does a floating deck cost?
Costs vary based on size, materials, and complexity. For a rough idea of what you might expect to spend based on material choices, check out this guide.
Will a floating deck add value to my home?
Outdoor living spaces consistently rank among the home improvements with the strongest return on investment. A well-built floating deck expands your usable square footage and improves curb appeal, particularly when built with durable and attractive materials.
Ready to Build? We Have All the Materials You Need
A floating deck is one of the most rewarding outdoor projects you can take on. It’s practical, versatile, and can deliver decades of low-maintenance enjoyment (when built with the right materials).
Whether you’re just starting to plan or you’re ready to pick up materials, our team at Zeeland Lumber & Supply is here to help. We carry everything you need for a quality floating deck build, from pressure-treated framing lumber to Trex composite decking, railing, hardware, and fasteners.
Stop by one of our locations or reach out to our team for project guidance, material estimates, and expert advice. We serve West Michigan, Eastern Michigan, and Northern Indiana, and we’re committed to helping you build something you’ll love.